Getting started with aRMT app of RADAR-Base to collect Patient Reported Outcomes (PRO) #
Active remote monitoring is an effective method to collect patient-reported outcomes (PRO), e.g., via questionnaires, active tasks, and challenges. Active remote monitoring can be used to analyze cognitive behaviours, mental health and overall well-being of an individual or cohort.
In the space of RADAR-base, the Active App (aRMT) or so called “Questionnaire app” is widely used to collect electronic questionnaires/surveys and to provide input to complete other active tasks scheduled in the study protocol. One highlight of the aRMT app is the ability to remotely configure/modify study protocol and/or questionnaire contents.
This article will guide you through an evaluation of the aRMT app by allowing you to enrol as a study participant and complete questionnaires. Following, you will find instructions to install the aRMT application on your Android phone and enrol one or more participants in the study management system, called ManagementPortal.
A video demonstrating the aRMT app.
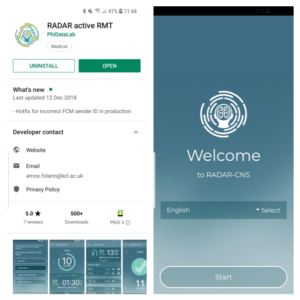
Step 1. Download and Install RADAR-Base aRMT from Android playstore. #
Please go to the Play Store on your Android phone, search for “RADAR active RMT,” and install the application. Once installed you will see the welcome screen to select your preferred language and start the process. The default language is set to English.
Step 2. Login into ManagementPortal #
- Login to ManagementPortal
- Login using username and password provided.
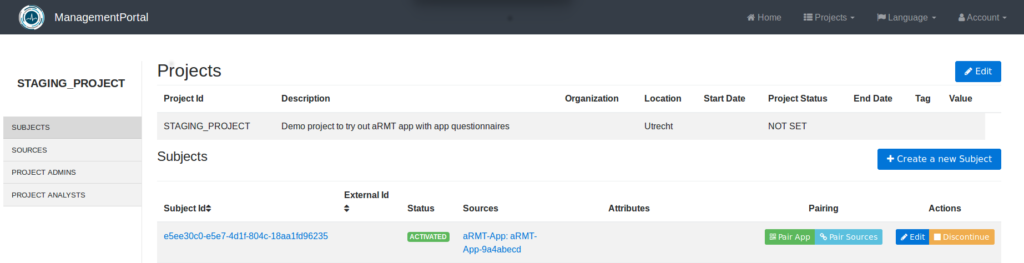
Once logged in, you will see the projects that are accessible to you. Click on the View button to go to your project view. The project view gives information about the relevant project, subjects (participants), sources (apps, devices connected to the project) and users.
Step 3. Participant on-boarding #
The participant onboarding process is quite easy and can be done with a few clicks and by scanning a QR code generated by the system.
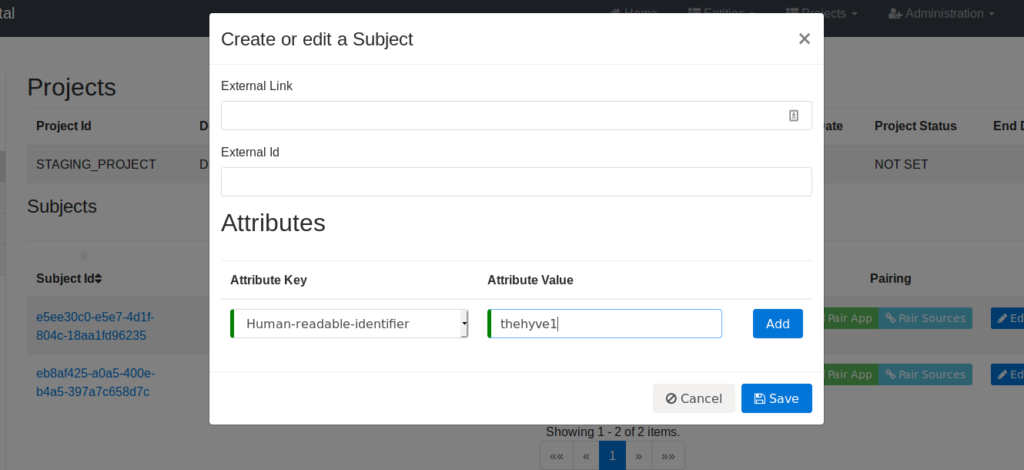
- To start with the process, create a new subject to add a new participant to the study. Click on Create a new Subject on your study view.
- By default, you do not have to enter any details here. However, we recommend you mention a unique External id (ideally one that refers to an identifier from an external system, such as identifiers from your organization or management system) to easily identify your subject from the others. Click on Save to create the subject.
- You will see a new subject created which displays your external id.
Step 4. Generate QR code for your participant #
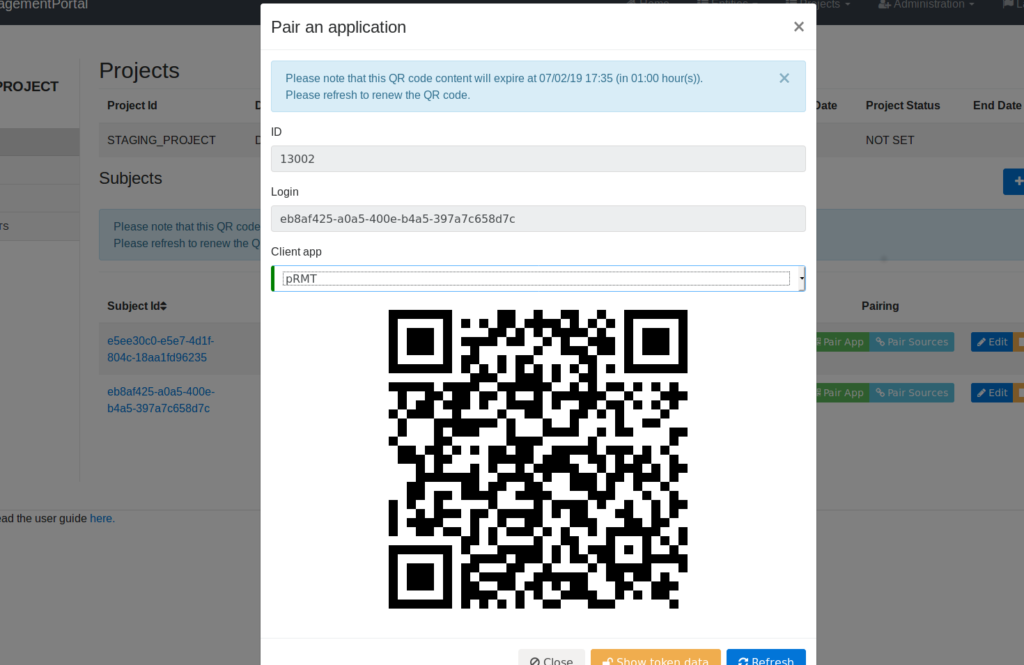
- Click on Pair App on the subject you created.
- You will see a pop-up. From the Client app drop-down, choose aRMT. Then you will see a QR code generated for you.
Step 5. Scan QR code from aRMT app and start completing tasks #
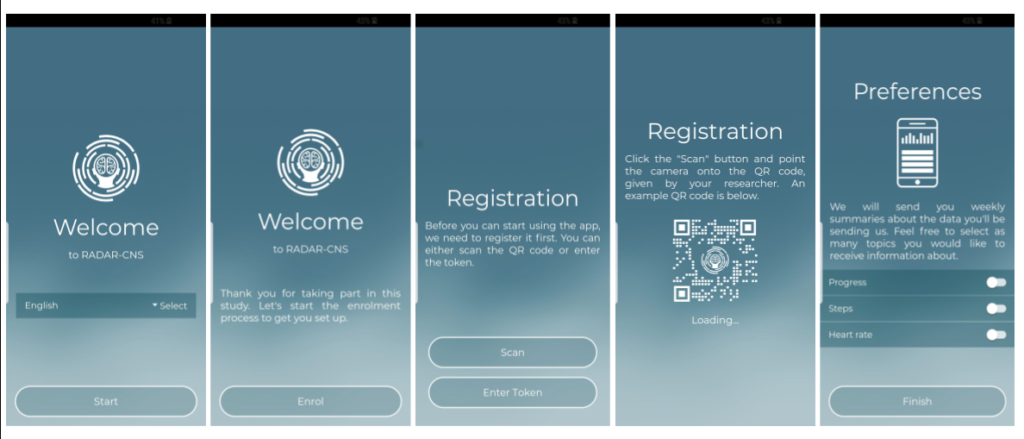
- Open the aRMT app you have installed on your phone, select your preferred language then click on Start.
- Continue by clicking on Enroll to enrol your participant to send data from aRMT app.
- Click on Scan and scan the QR-code you created earlier.
- Once the QR-code scanning is successfully completed, the app will load the questionnaires and tasks based on the protocol configuration.
- Finally, click on Finish to complete the enrollment process.
This will enable you to send the completed questionnaire and test data from the app on your phone.
Step 6. Explore the aRMT app, scheduled tasks and complete them. #
- Once enrolled, you will see the home screen. It shows an overview of your task lists and task progress and allows you to start answering the first task on your schedule.
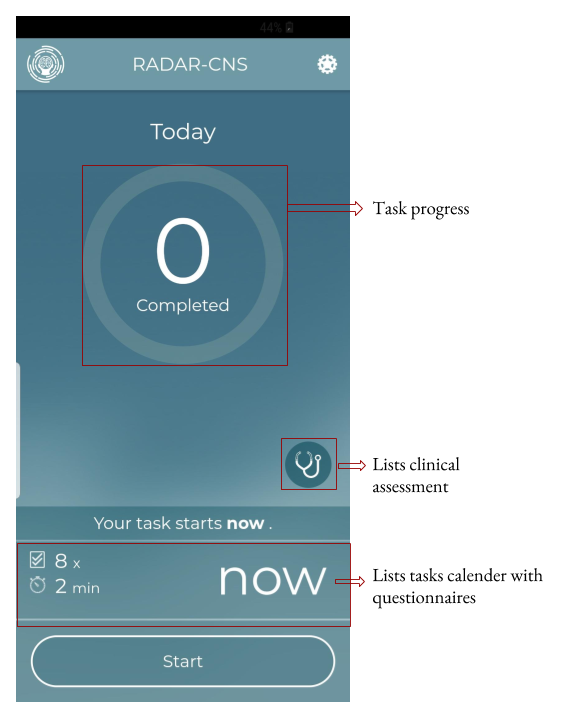
- Click on the Start button to answer questionnaires and complete tasks. The process is very simple and intuitive. Select the answer and press Next for the next question. Once the questionnaire is completed, the app updates the progress and schedule accordingly.
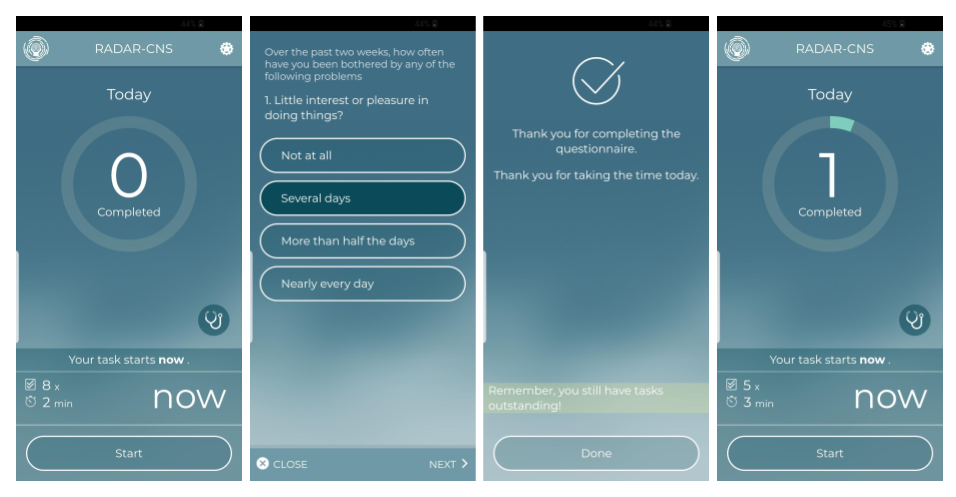
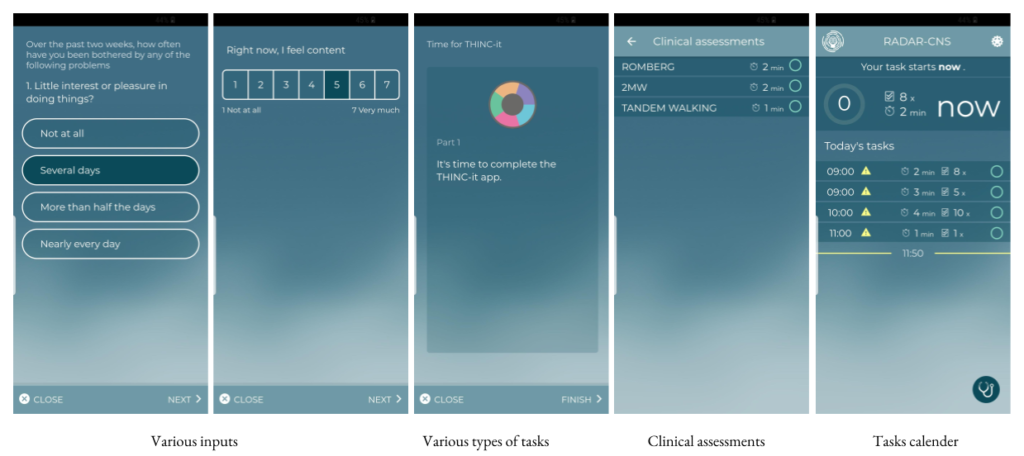
- The app enables various kinds of inputs for questions such as multiple choice, range, check-box etc and also enables clinical assessments such as timed-tasks with instructions etc. The app also comes with a tasks calendar which displays today’s task agenda.
Conclusion and follow-ups #
The purpose of this article is to enable users to get familiar with the aRMT app and the features it offers. Get in touch if you are interested in RADAR-base or Active App (aRMT) and want to know more about it or how you can customize the app to fit your custom remote monitoring assessments.


